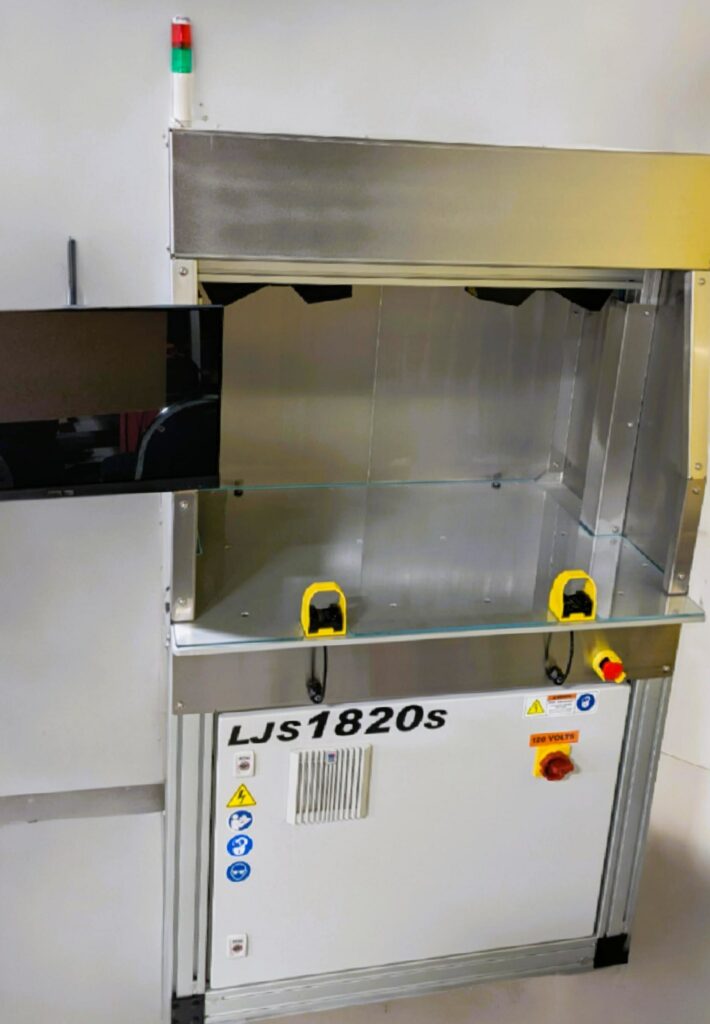
The LJS1820S Manual 3D Static Measurement System performs surface defect detection for cleanroom surface inspection, medical devices, precision lenses, advanced packaging and coatings, and more. (Photo: Bold Laser Automation/PRNewswire)
Two new systems from BOLD Laser Automation are reported to provide fast, accurate, and repeatable non-contact measurements.
BEDFORD, N.H.—Two precision measurement systems recently introduced by Bold Laser Automation, Inc., are reported to be engineered to provide fast, accurate, and repeatable non-contact measurements for sensitive materials in cleanroom and high-tech manufacturing environments.
The new LJS1820S Manual 3D Static Measurement System and CDM1820S Confocal Differential Static Measurement System provide manufacturers with “cost-effective, operator-friendly tools for critical quality control and contamination detection applications,” according to a release from Bold Laser Automation.
“Many manufacturers struggle to achieve high-accuracy thickness and surface measurements without resorting to overly complex or costly systems,” said Todd Lizotte, CEO and co-founder of Bold Laser Automation, in a company release. “At Bold, we believe in delivering high performance without overengineering—systems that are designed to solve real problems without turning into million-dollar solutions.”
A developer of advanced laser processing and metrology systems, Bold Laser Automation specializes in precision laser and metrology systems for industries ranging from biomedical device manufacturing to precision glass and optics processing. The company delivers custom and standard automation systems to “help manufacturers meet demanding quality, speed, and regulatory requirements without unnecessary complexity or cost,” the release stated.
The LJS1820S system, described as “ideal for cleanroom and advanced materials manufacturing,” is purpose-built for precision 3D contamination detection and surface analysis. Equipped with dual Keyence LJ-S series snapshot sensors, the system performs full-area 3D inspections that are said to reveal particulate contamination, surface defects, and embedded residues. A static, ESD-safe platform, with an optional footswitch for hands-free data capture, enhances ease of use and repeatability, the company said in the release.

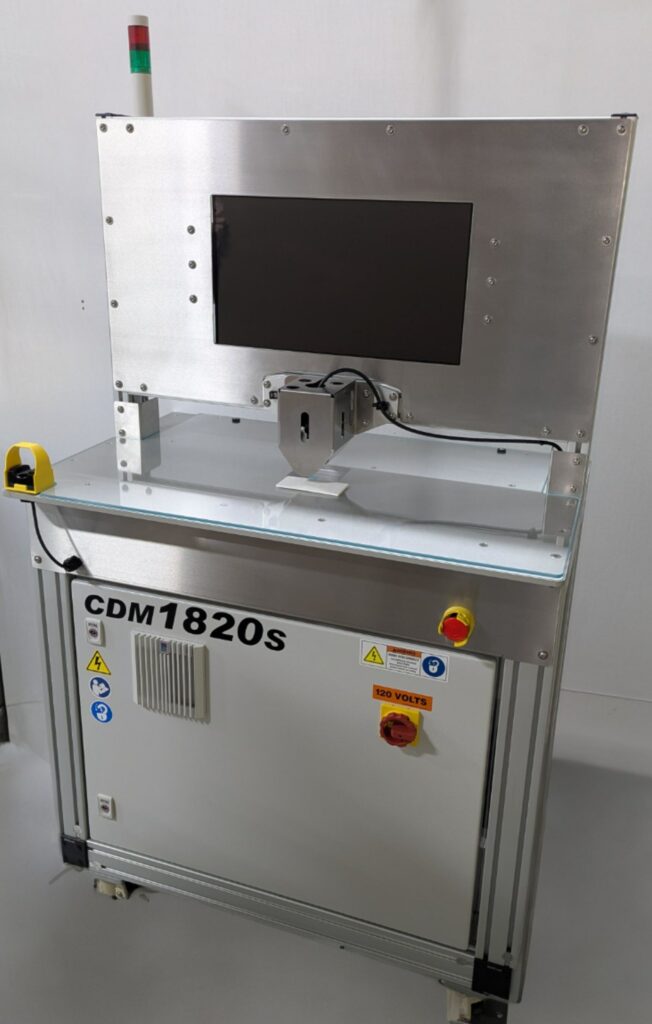
The CDM1820S Confocal Differential Static Measurement System is reported to be well-suited for any application that demands precise, non-contact thickness measurement of delicate or multi-layer materials, such as medical devices, flexible electronics and foils, optical films and filters, anti-reflective coatings, and others. (Photo: Bold Laser Automation/PRNewswire)
The CDM1820S system is optimized for precision thickness measurement of thin films, foils, glass, fabrics, and sensitive materials (from 10 microns up to 35mm, based on the sensor). Integrated with dual Keyence CL Series confocal sensors, the CDM1820S enables non-contact, high-resolution measurements with real-time display and configurable reporting. Like the LJS1820S, it features a customizable user interface and an optional footswitch-activated acquisition system, according to Bold Laser Automation.
“These systems were designed with practicality in mind—manual positioning, intuitive interfaces, and data exports for QA/QC reporting are all standard,” added Lizotte. “The CDM1820S system sets a new benchmark for manual thickness measurement systems where traceability, accuracy, and operator safety are top priorities.”
Among the key uses of the technology is the ability to verify thickness for applications involving carbon fiber composites, plastic films, ultra-thin glass (250+ microns), web, textiles, food packaging, and aerospace and automotive components. Another is the ability to randomly take witness samples or punch coupons for offline measurements, a critical task for quality assurance and material savings.
Both platforms are U.S.-built and meet cleanroom electrical and safety standards. According to the release, they feature “ergonomic designs, robust mechanical enclosures, integrated computer systems, and clear documentation to support installation, operation, and compliance workflows.” In addition, user interface (UI) and reporting tools are said to enable seamless integration into existing QA/QC processes.
The new systems are said to underscore Bold Laser Automation’s commitment to delivering “economical, high-performance solutions tailored to the evolving needs of modern manufacturers.”
